Showing posts with label dessert. Show all posts

Tuesday, August 27, 2013

Easy Peanut Butter Brownie Cookies


Yum! Yum! Yum!

If you like Reese's, or brownies, or cookies or any combination of the 3, then you are in luck my friend.  This easy homemade recipe will become one of your dessert (or dinner :)) staples because its got something for everyone!

Here's what you need:


4 ounces unsweetened chocolate chopped

1 cup peanut butter chips (or chopped up Reese's)

6 Tablespoons Butter

3 Eggs

1 Cup White Sugar

1 1/2 Teaspoon Vanilla Extract

1/2 Cup All Purpose Flour

2 Tablespoons Unsweetened Cocoa Powder

1/4 Teaspoon Baking Powder

1/4 Teaspoon Salt

1 Cup Semi-Sweet Chocolate Chips

Here's what you do:

1. Melt unsweetened chocolate, semi sweet chocolate chips, and butter stirring occasionally until smooth.

2.  Whip eggs and sugar in a separate bowl for about 2 minutes or until it thickens.  Stir in the vanilla and the melted chocolate mixture.

3.  Combine the flour, sugar, baking powder, coca powder and salt in a separate bowl. Once well mixed, gradually add this combination into the melted chocolate mixture.  Mix the remaining peanut butter cups into the mixture.

4.  Cover dough and chill for at least and hour or overnight.

5.  Heat Oven to 350 degrees F.  Roll chilled cookie dough into 1 inch dough balls and place on ungreased cookie sheet.

6. Bake for 9-11 minutes and allow to cool for 5 minutes on the baking sheet.

7. Enjoy!!


*Instead of using peanut butter chips you can experiment with white chocolate chips, candy bar pieces, etc.
**Recipe should make 3 Dozen cookies
*** The original recipe that this recipe was adapted from was for Chocolate Truffle Cookies

Friday, June 21, 2013

Best Homemade Chocolate Chip Cookies!

{picture from tonight's batch of cookies, featured on my mother's pottery}

I've done it!  I have found THE recipe, and by THE I mean the yummiest gooiest most superb recipe for chocolate chip cookies!  Here's how it happened:

Our neighbor across the street, Ed, watched our sweet lil pup for us while we were out of town so I wanted to make him a "thank you" treat.  I was browsing on the internet for inspirationg and just happened to see a good looking picture for cookies on pinterest.  I clicked on the link and followed my way to macdaddy recipe itself.  I just happened to have all of the ingredients to conjure the cookies up, so conjure up I did....

Well, it just so happens that I am not really a big fan of chocolate chips cookies (who would have thunk?) so I didn't even try the cookies before I packaged them up and walked them over to Ed's.  There were a few cookies left though, so I gave some to Wil for work and took some to my work as well.

It wasn't too long after that that Wil exploded with enthusiasm on how amazing these cookies were.  His co-workers agreed they were fantastic.  My coworkers ate them up before I even knew what happened and Ed and his wife have said they were the best chocolate chips cookies they have ever had.

Wow.  And I didn't even try one.

So after all that fuss, I made them again tonight and tried one.  Yup.  They were right.  They are absolutely fantastic!

So, without further ado, make your way to the original recipe at allrecipes.com OR follow the recipe I have posted below.  (The original recipe has nuts in it, but I make them without.)

You will Need:

1 Cup Butter, softened
1 Cup White Sugar
1 Cup packed brown sugar
2 Eggs
2 Teaspoons Vanilla Extract
3 Cups All-Purpose Flour
1 Teaspoon Baking Soda
2 Teaspoons Hot Water
1/2 Teaspoon Salt
2 Cups Semi-sweet Chocolate Chips

Directions:

1.  Preheat oven to 350 degrees F

2.  Cream together the butter, white sugar, and brown sugar until smooth.  Beat the eggs in one at a time, then stir in the vanilla.  Dissolve the baking soda in the hot water and add it to the batter along with the salt.  Stir in the flour one cup at a time.  Then add the chocolate chips.

3.  Drop spoonful portions of the batter onto an ungreased pan or baking stone. (I use a baking stone and they turn out perfectly gooey and crispy)

4.  Bake each batch about 10 minutes or until they are slightly brown.

Makes about 25-30 cookies.

Hope you enjoy!  I'd love to hear how you like them!

Saturday, December 1, 2012

Christmas Tree Cupcakes

Christmas Tree Cupcakes
Is there anything more festive than a Christmas tree? Add some greenery to your dessert table with these cute Christmas trees!


Wednesday, November 21, 2012

Chocolate Peanut Butter Cupcakes

Chocolate Peanut Butter Cupcakes
Love the amazing combination of chocolate and peanut butter?  Enjoy that combination with these delicious cupcakes.  


Rubber Duckies

Rubber Duckie Cupcakes
Who could pass up these adorable ducks?! Quack your way to a fun party with these too cute for words cupcakes!


Thanksgiving Turkeys

Thanksgiving Turkey Cupcakes
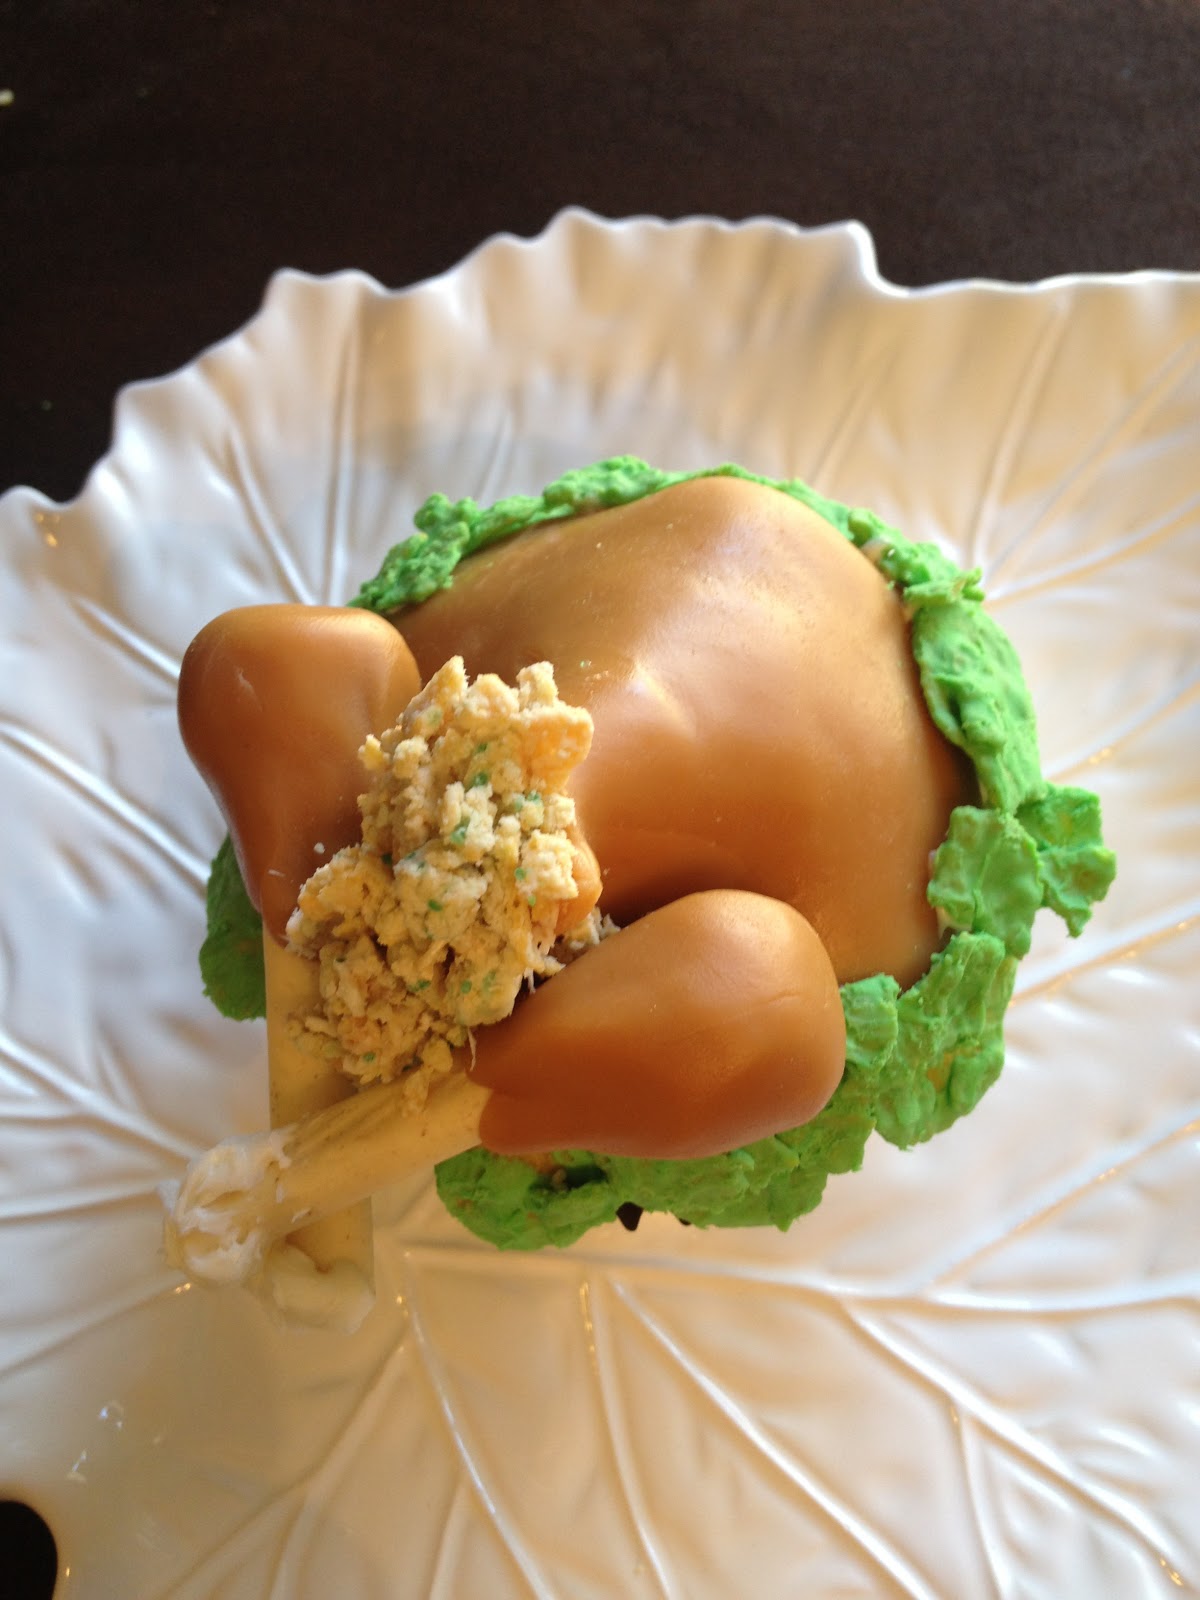
You're sure to be the favorite guest at any Thanksgiving feast when you extend the turkey eating through dessert!  These cupcakes are so cute they are sure to be talked about for years to come!


Tuesday, September 18, 2012

Nutella and Cream Cheese Crescents


   Nutella and cream cheese crescents.  Enough said.  This dessert is so yummy and so easy!  All you need is a can of crescents, cream cheese, nutella, sugar and cinnamon.  Roll out the crescents and put about a tablespoon of cream cheese or nutella in the center of the crescents.  Roll them back up.  Mix a bowl of half cinnamon and half sugar.  Roll the crescents around in the sugar/cinnamon mixture and bake as directed on the can.  YUM!  You might want to make more than one batch though, because my husband ate the whole first batch in about a two minutes.  (I was lucky to get a picture!)  Enjoy making- and eating- these delicious crescents, I know I did!


P.S.  You can even mix the cream cheese and nutella in the same crescent!
P.P.S.  Peanut butter and nutella sound like a great combination too ;)

Tuesday, September 11, 2012

Hamburger Cupcakes


   I have been dying to go to a cookout just so I could make some hamburger cupcakes.  I finally got to go to a cookout over Labor Day and enjoyed every minute of making these hamburger cupcakes!  The best part is, they are pretty easy to make!  Here's what you need to make these yummy looking hamburgers:

yellow cupcakes
brownies
 white icing
red/burgundy food coloring
yellow food coloring
2 sandwich bags
sesame seeds
circle cookie cutter or a small lid

   After you bake the cupcakes take them out of the liners and cut the middle of the cupcake out leaving the muffin top and about an inch on the bottom.  This will leave you with the hamburger buns.   After you bake the brownies in a 9 x 13 pan, cut out the hamburger circles using a cookie cutter or a lid. (I used a nutella lid because it was the perfect size to make the brownies fit inside the cupcakes.)
   Next dye some icing red/burgundy and yellow.  This will be your ketchup and mustard.  Put the dyed icing in ziploc baggies and cut the end of a corner.  Squeeze the icing onto the brownie just like you would ketchup and mustard but make sure to get lots on the edge so that it squishes and runs over when you put the bun on.  


   One last thing, dab some sesame seeds on the top of the cupcakes.  Sesame seeds are practically tasteless but add so much to the look.  And thats it, so easy and SO cute!! They were a huge hit at the cookout and I will most definitely be making these mini sliders again! 


Wednesday, July 25, 2012

Chocolate Peanut Butter Cupcakes


 As I mentioned in my previous post, I went to a birthday party and made two fun cupcake recipes!  The first recipe I ventured was a strawberry lemonade cupcake, and you can view how that turned out here. The second one was a chocolate peanut butter cupcake.  Yum to both!  Although I have to admit the chocolate peanut butter ones were my favorite.

   I got the recipe for the chocolate peanut butter cupcakes from Annie Eat's Blog, although lack of ingredients caused me to tweak the frosting recipe a bit.  Being my biggest critic, there are a few things I would change about the recipe:  Next time I will save myself the trouble and use a devil's food boxed cake mix instead of making the chocolate cake by scratch.  The made from scratch recipe was a little dry for my taste, and the devil's food cake mix I usually get always turns out moist and delicious.  I wouldn't change a bit about the peanut butter balls that go in the center of the cupcake, those were DELICIOUS!  However, some of them did kind of disappear and left a little hole in the center of the cupcakes, but some turned out fine and were still intact in the center.  The ball disappearing didn't effect the taste, though, it was just kind of weird.

   On a really great note, I can honestly say this peanut butter frosting is the best frosting I have ever tasted!  Annie Eat's recipe called for a cup of frozen whipped topping, which I didn't have, so I used 1/4 cup fat free vanilla coffee creamer and two spoon fulls of marshmallow creme instead.  Everything turned out great in the end so I'm sure no matter which ingredients you choose to use, this frosting will not disappoint!


Tuesday, July 24, 2012

Strawberry Lemonade Cupcakes


   For a friend's birthday party I decided to go all out and make some cupcakes:)  I had two different recipes I had been wanting to whip up, so what better time than a birthday?!  One of the cupcakes that I  tried out was a strawberry lemonade cupcake.  I got the idea for this concoction from Easy Baked's Strawberry Lemonade Layer Cake but went for the full touchdown by making cupcakes instead.  The cake recipe called for a boxed strawberry cake mix, so I used a strawberry boxed cake mix and followed the directions accordingly. However, the baker noted that the lemonade filling she used was not a good consistency to ice cakes (or cupcakes) so I followed her tweaked recipe for lemonade frosting.

Fluffy Lemonade Frosting
8oz package of cream cheese at room temperature
1 packet of Kool-Aid Lemonade
yellow food coloring
7 ounces of marshmallow creme
1/3 cup powdered sugar
8 ounces cool whip

Directions
1.  Cream together the cream cheese, Kool-Aid packet and food coloring (to your desired color) until well mixed.
2.  Then add the marshmallow creme and powdered sugar.  After that mix beat in the cool whip until everything is mixed and has a fluffy texture.
3.  Refrigerate the icing until right before serving.

   The frosting was a cool consistency, light and fluffy, but with enough base that the icing didn't run off or melt.  I am usually impressed with boxed cake recipes, and this strawberry mix was no different- the cupcakes turned out moist and delicious.  All in all, they really did taste like strawberry lemonade and were a fun summer twist to usual strawberry cupcake!


Tuesday, June 19, 2012

Baby Reveal Cupcakes


   I love cupcakes.  I love to eat them, decorate them, look at them, bake them, read books about them, buy them, and share them with others.  Not just any ol' cupcakes though, good-tastin AND good-lookin cupcakes.  Here are a couple examples of the cupcakes I am talking about: 


Most of the ideas for these cupcakes came from the books Whats Up Cupcake? and What's New Cupcake?, but some of them, I'm proud to say, are originals.  


Speaking of originals, one of my couple friends from church decided to have a baby reveal party to find out the sex of their baby.  I was so honored when they asked me to be the one to make the cupcakes!  However, it was a lot harder than I thought it was going to be, not making the cupcakes, but keeping the secret! haha.  The only people that knew the sex of their precious baby were the Doctor and I- for almost a week!!  Goodness that's a hard secret to keep; it sure was worth the wait, though!  Here's how they turned out:


They were having a girl, so of course the inside needed to be pink.  I saw a bunch of ideas online that had colored icing in the middle of the cupcakes, but I really didn't want to do that, because if there was icing on the top and icing in the middle that would make a very sicky-sweet cupcake.  So I decided to make the inside a colored cake instead of colored icing, which turned out perfect, and almost everyone thanked me after they took a bite.


Here's how I made them:  I baked a batch of chocolate cupcakes and a batch of yellow cupcakes normally following the directions on the box.  Then I baked a strawberry cake according to the box. (If you want it to be blue for a boy then you can use white cake and dye it bright blue.) After they were all baked and cooled, I plunged out the middle of all of the cupcakes with a handy cupcake plunger (shout out to my man for giving me this idea) and then just set the insides to the side (or ate them as I went, either way works).  Then I plunged the strawberry cake and stuck them inside the cupcakes.  If you want to be super careful that the colored cake doesn't show through or if you don't want to use icing on the top of the cupcakes then you can put some of the cupcake insides on top of the strawberry cake to pack it in there.  I did this for some of the cupcakes, but realized it wasn't really necessary because I was going to decorate the cupcakes with icing on top which in turn covered up the pink.


Then I iced the yellow cupcakes with chocolate icing and the chocolate cupcakes with vanilla icing.  dashed some blue and pink sprinkles over them and added some blue and pink toppers I made with white chocolate.  I was very please with how they turned out, and even more pleased for my friends that are having a baby girl!!!